

How to Replace Door Weather Stripping: A Complete DIY Guide for Fall and Winter 2
How to Replace Door Weather Stripping: Understanding When and Why It’s Necessary
How to replace door weather stripping is an important skill because door weather stripping helps keep your home comfortable by sealing gaps between the door and its frame. Over time, it can wear out, crack, or lose elasticity, letting in drafts, moisture, and even pests. So how do you know when it’s time to replace it?
You may need to replace your door weather stripping if you notice:
- Cold air seeping in around your door edges.
- Higher heating or cooling bills than usual.
- Visible cracks, gaps, or peeling strips.
- Water leaks during heavy rain or snow.
- Difficulty in fully closing the door without a gap.
Why Replace in the Fall or Early Winter?
Fall and the beginning of winter are the best times to replace weather stripping because sealing your doors before the coldest months ensures your home stays warm and energy efficient. The advantages of replacing during this season include:
- Energy savings: Less heat loss in winter.
- Comfort: No more cold drafts in your living room or bedrooms.
- Moisture control: Prevents snow or rainwater from seeping in.
However, there are a few disadvantages:
- Cold weather installation can be harder (adhesives don’t bond as well in low temperatures).
- Busy season for contractors — scheduling professional help may be more expensive or take longer.
DIY vs. Hiring a Professional: Cost Comparison
- DIY Replacement: If you do it yourself, the cost is usually between $15–$50, depending on the material you choose.
- Hiring a Professional: A handyman or contractor may charge $75–$150 per door, including materials.
If you’re handy and willing to learn, DIY is cost-effective. If you have multiple doors or prefer convenience, hiring a pro saves time.
Tools and Materials You’ll Need Before Replacing Weather Stripping
To successfully replace your door weather stripping, preparation is key. Here’s what you’ll need:
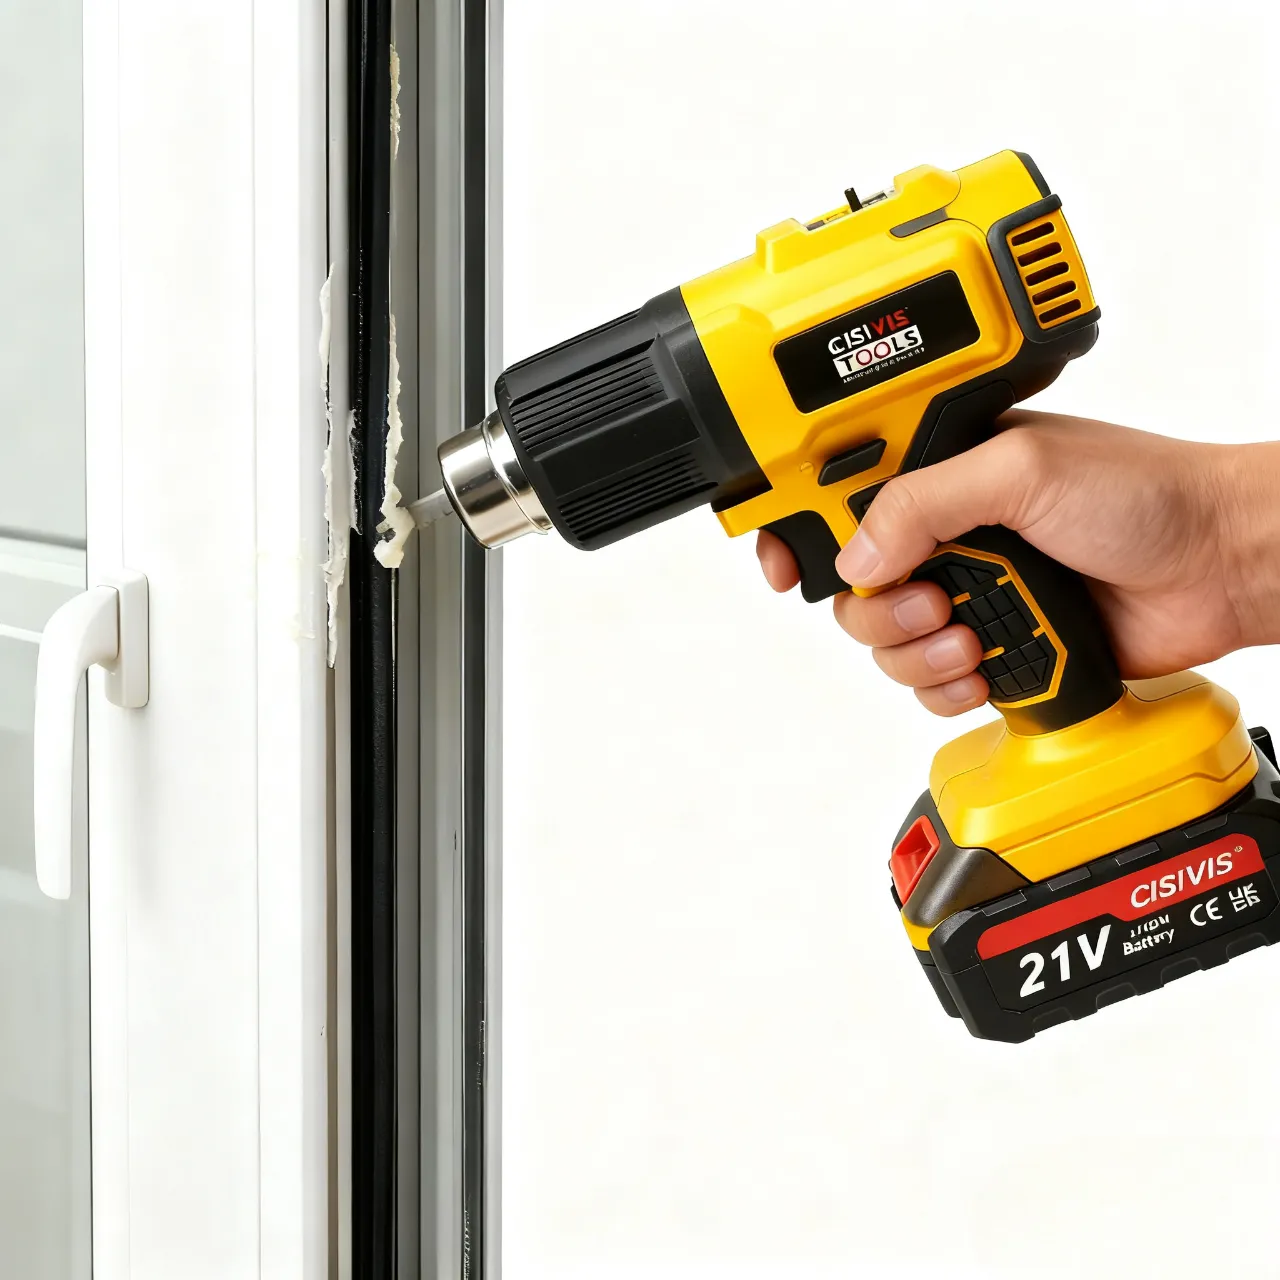
Tools (electric tools recommended for efficiency)
- Cordless Drill – for installing screws if your weather stripping requires fasteners.
- Electric Utility Knife or Oscillating Tool – for cutting and trimming old strips or new material.
- Heat Gun – helps soften adhesive residue for easier removal.
- Measuring Tape – to ensure accurate cuts.
- Screwdriver Set – manual backup for adjustments.

Materials
- New Weather Stripping: Choose the type best suited for your door (foam, rubber, silicone, or adhesive-backed).
- Adhesive Remover: For cleaning leftover glue from the old strip.
- Rubbing Alcohol or Cleaning Solution: To clean the door frame before installation.
- Sandpaper (optional): To smooth rough surfaces for better adhesion.
Other Preparations
- Clear the workspace around the door.
- Check door alignment — a misaligned door may need hinge adjustment before replacing seals.
- Wear protective gloves and goggles if using power tools.
Step-by-Step Guide: How to Replace Door Weather Stripping (Beginner-Friendly)
Even if you’ve never replaced weather stripping before, don’t worry. Just follow these simple steps:
Step 1: Remove the Old Weather Stripping
- Open the door wide for easy access.
- Use your utility knife or oscillating tool to gently cut and peel away the old strip.
- If it’s nailed or screwed in, unscrew with a cordless drill or screwdriver.
- Remove any leftover adhesive using adhesive remover or a heat gun.
Step 2: Clean and Prepare the Door Frame
- Wipe the surface clean with rubbing alcohol or a household cleaner.
- Make sure the frame is completely dry before proceeding.
- Sand lightly if the surface is uneven.
Step 3: Measure and Cut New Weather Stripping
- Use a measuring tape to check the length of the top, sides, and bottom of the door.
- Cut your new weather stripping to size using an electric utility knife for clean edges.
- For adhesive-backed strips, peel back a few inches of the protective layer to start.
Step 4: Install the New Weather Stripping
- Start at the top of the doorframe, pressing the strip firmly into place.
- Work your way down both sides, ensuring there are no gaps.
- If screws are required, use your cordless drill to secure the strip.
- At the bottom, install a door sweep or threshold strip for maximum insulation.
Step 5: Test and Adjust
- Close the door slowly and check for gaps or difficulty closing.
- Adjust as needed by pressing the strip tighter or repositioning.
- Once the seal feels tight but not overly stiff, you’re done!
Conclusion: Why Weather Stripping Matters + CISIVIS Advantage
How to replace door weather stripping may seem like a small home project, but it can greatly improve comfort, save energy, and protect your home. By doing it yourself with the right tools, even beginners can complete it easily and cost-effectively.
At CISIVIS, we provide reliable electric power tools that make jobs like this easier and faster. Our products support OEM and ODM customization, meaning you can choose premium features like digital battery displays, multiple battery packs for extended runtime, or cost-effective motor options depending on your budget. Whether you are a wholesaler or a professional, CISIVIS ensures high-quality, customizable solutions tailored to your needs.

thanks to the author for taking his time on this one.
I simply had to thank you very much once more. I am not sure the things I might have undertaken in the absence of the entire creative concepts revealed by you directly on my area of interest. It was before a very terrifying crisis in my opinion, nevertheless coming across a new specialized avenue you handled it made me to weep over fulfillment. I will be thankful for the support and hope you know what an amazing job you were getting into educating people today thru your web site. Most probably you haven’t got to know any of us.